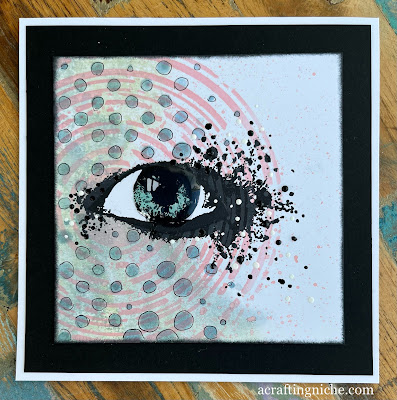
After the clean lines of the previous cards, this one is a bit more busy.
I started by using two shades of Distress Ink, using "Old Paper" and "Weathered Wood", slightly spritzed on my craft mat and then dragging the card through the ink on the left hand side only.
Once dry, I used the Visible Image "Supernova Stencil" with "Saltwater Taffy" Distress Ink, to create the circular shape.
I then used Versafine Clair "Nocturne" black ink to stamp the eye, which is part of the Visible Image "Where Dreams Take You" stamp set.
Next, I added the dots, using the Visible Image "Two Tone Stencil" with "Sky Blue" Archival Ink. I then went around each circle with a black fine line pen to accentuate them more.
Returning to the eye area, I added colour to the eye itself by using "Salvaged Patina" Distress Oxide Ink, then coating it with Ranger "Glossy Accents".
Finally, I added black and white dots around the eye area using Ranger "Enamel Accents", then set to one side till the Glossy Accents had set, which actually took about three hours!

Brilliant "eye" catching card in beautiful muted colour tones
ReplyDeleteThank you, saw what you did with "eye catching" x
DeleteThis eye stamp is very striking Sam and even more so with the added stencilling, and I love the extra black and white enamel accents too. x
ReplyDeleteThank you x
Delete