52 Week Mini Art Card/Tag Challenge

Copywrite / Privacy

Thursday, 27 July 2023

Visible Image Stamps "Born to perform" gift tag


Here's a tag I made last night, but got engrossed in the final of "The Great British Sewing Bee" on TV so forgot to upload it.  Did you watch the programme? I felt Asmaa was consistant with all her makes and that final dress was amazing.  I still have no idea how she made it.  A worthy winner as far as I am concerned!

Anyway, back to the tag.  I started by using three shades of Ranger "Archival Inks" to create the background colour, starting with the lightest "Pink Peony" blending in to "Vibrant Fuchsia" and then "Cactus Flower" at the base of the tag.

I lay the Visible Image "Breakout" stencil across the top corner of the tag and applied more of the "Cactus Flower" ink through the stencil.

I then moved the stencil to the lower right hand side and repeated the process.

Moving on to the stamping, I used Versafine Clair "Nocturne" black ink with the Visible Image "Born to perform" stamp set.  Stamping the figure first, then the word "Dance" at the base of the tag and then "Born to" at the top left.

I then used Versafine Clair "Morning Mist" grey ink to stamp two sizes of stars, which are also part of the Visible Image "Born to perform" stamp set.  I added a bit of sparkle to the middle of the stars using "A Wink of Stella" pen.

Finally, using a black pastel pencil, I grounded the dancer.  I added a few touches of white gel pen to areas of the dancer to make her pop a little too.

Wednesday, 26 July 2023

52 Week Mini Art Card/Tag Challenge Group - QR Code


If you are interested in joining the  52 Week Mini Art Card/Tag Challenge, scan this QR code, it will take you straight to the facebook group for the challenge.


Clarity Stamps "Ploughed Field" stencilled card


I couldn't sleep, my mind was racing, so I got up and came down to craft.  I love the silence of "silly o clock" which I think is reflected in the muted tones of the colours I chose for this card.

I've used the Clarity Stamps "Ploughed Field" Stencil with a selection of shades of Ranger Archival Inks.  These are the colours I used:  Pink Peony, Vibrant Fuchsia, Tiger Lily, Sepia, Plum and Thistle.

The greeting is also by Clarity, being part of their "Birthday Occasions Sentiment" stamp set, which I stamped in Ranger "Thistle" Archival Ink.

Tuesday, 25 July 2023

Visible Image Stamps "Life Is Beautiful" card


Having had a few days away, I'm back in my "happy place" crafting again.  The sun is shining and all is good in the world!

This card features a Visible Image stamp set and several of their stencils and a whole host of different inks! 


I started with a white piece of card and "Milled Lavender" Distress Ink.  I put some ink on my glass mat, then lightly spritzed it and then swooshed the white card through the ink.  I then used my heat gun to dry the surface before repeating the process with four more Distress Inks:  Victorian Veleve, Tea Dye, Weathered Wood and Old Paper.

Next I used "Peat Moss" Ranger Archival Ink through the Visible Image "Seeing Stars" stencil, uising the chequerboard section of the stencil.

I then used "Garden Patina" Ranger Archival Ink through the Visible Image "Strobes" stencil on the left hand side of the card.

After that, I used "Shadow Grey" Ranger Archival Ink through the Visible Image "Strobes" stencil on the top right hand side of the card.

I then used "Cornflower Blue" Ranger Archival Ink through the Visible Image "Breakout" stencil" at the base of the card.

Moving on to the stamping, I used Versafine Clair "Twilight" dark blue ink to stamp the bird and words, all part of the Visible Image "Life Is Beautiful" stamp set.

Placing a mask over the bird, I stamped the circles, also part of the Visible Image "Life Is Beautiful" stamp set using Versafine Clair "Morning Mist" grey ink.

I used Van Goch pastel pencils to add depth of colour in areas.

Placing the mask back over the bird and strips of paper over the words, I used Dr PH Martin's "Bleed Proof White Paint" with a fan shaped brush to create splatters across the surface.

Removing the masks, I edged the card in Versafine Clair "Twilight" ink using a finger dabber.

I then used white and black Ranger "Enamel Accents" for extra dots.

Finally, mounting the piece on to navy blue card and then on to a white card blank.

Friday, 21 July 2023

Clarity Stamps "Birdhouse" on a stencilled rose background


This is a very different card from the last few I have been making.

I used a piece of Shenandoah patterned paper for the base and lay the Clarity Club Stencil #45 "rose" over the top.  Through the stencil, I applied three shades of Versafine Clair Inks: Charming Pink, Glamorous and Purple Delight, applied with a small blending brush.

I then used Van Goch Pastel Pencils to add more depth of colour and then inked the edges of the card uisng Versafine Clair "Fantasia" ink.

Using Versafine Clair "Monarch" purple ink I stamped the birdhouse and foliage which is part of a Clarity stamp set called "Birdhouse".

Next I stamped the greeting, using the Clarity "Birthday Occasion Sentiment" stamp set. I added touches of Posca Pens and White gel pen to areas of the stamping.

Finally, I mounted the card on to co-ordinating pink card before sticking on to a red card blank.  

Sweet Poppy Stencils "Daisies" Birthday Card


I seem to be creating more CAS cards the past couple of days and here is another one! 

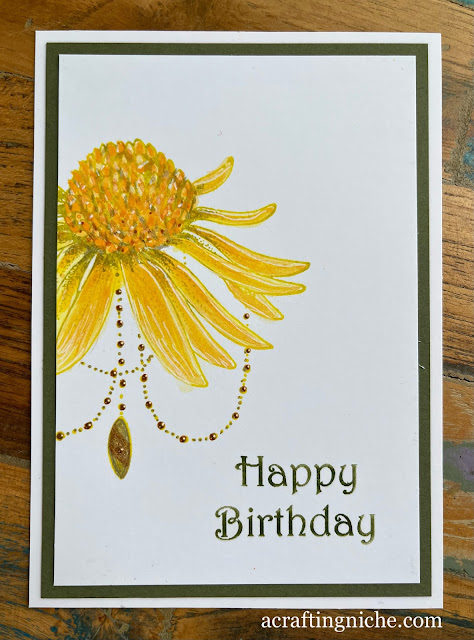
For this card, I have used the Sweet Poppy Stencil A5 stamp set called "Daisies" stamped in Versafine Clair "Cheerful" ink and then coloured with a selection of Derwent Inktense pencils, applied with a paint brush.  These are the colours that I have used:  Cadmium Yellow, Lemon, Golden Yellow, Cadmium Orange, Burnt Orange and Leaf Green.  I have also used a white and metallic gold gel pen too.

The sentiment is also by Sweet Poppy Stencils and is part of their "Hugs & Kisses" stamp set, stamped in Versafine Clair "Shady Lane" green ink.

Finally for the chain, I used a gold gel pen and "Copper" coloured Liquid Pearls for the beads.

Lavinia Stamps "Lupin" the hare card


A quick play from me this morning using a Lavinia Stamp and stencil.

I stamped "Lupin" the hare using Versafine Clair "Acorn" brown ink, stamping it very lightly as I didn't want hard/solid lines. I used a mask to cover Lupin, while I applied green ink through the Lavinia Stamps "Feather Leaf" stencil.  I don't know which colour Archival Ink it was as I just used what was still on the brush, but I suspect it was "Peat Moss".

Removing the mask, I then coloured "Lupin" using a selection of Derwent Inktense pencils, applied with a brush.  The colours I used are:  Pink Flamingo, Amber, Mustard, Natural Brown and Dark Mink.  I then used a touch of white gel pen in a couple of areas too.

To ground Lupin, I used "Pumice Stone" Distress Oxide Ink, applied with a paint brush.  Then right under the feet, I used a pencil to create more depth of shadow.

Finally, I used a birthday greeting using the Clarity Stamps "Entwined Sentiments" stamp set, stamped in Versafine Clair "Shady Lane" green ink.

Thursday, 20 July 2023

52 Week Mini Art Card/Tag Challenge - 2024


For those of you who have followed me for a few years, you may remember that in 2017,2018 and 2019 I ran a weekly tag/art card challenge called "A Crafting Niche - 52 Week Mini Art Card/Tag Challenge", where I gave the group a weekly prompt and shared a tag I had made on that theme, then the members would create a tag on that theme too.  

At the end of 2019, I decided to stop the challenge as my circumstances at home had changed and also I was having more and more Design Team commitments too, so something had to give.

I found it interesting to see the different tags and the individual interpretation of the prompt.  The challenge is suitable for all abilities. For those who had struggled with their "crafting mojo" doing a disappearing act, it seemed to trigger people to get crafting again, which is no bad thing.

I have always loved making tags and after speaking to a friend, decided I would ask on the challenge  Facebook group (this is the link to the private group) if people would be interested in taking part.  A few have shown interest so I have decided I will go ahead with the challenge, starting in January 2024.

However, the start date is quite a distance away, so I plan to set a monthly prompt and share a tag of that theme at the start of each month to set the challenge in motion and allow people to prepare their base tags.

If you scroll to the top of this blog page, you will see a banner to the right of the "Home" button, titled "52 Week Mini Art Card/Tag Challenge" this is where you can see the prompts I have used in previous years and where the prompts for 2024 will be detailed too.

I'll be providing more details about the challenge soon, but for the mean time, please do check out the Facebook group and join if you are interested in taking part, also please let your crafting friends know, they might want to join in too. Here's the link to the Facebook group.

Sam x

Clarity Stamps "Leafy Swirl" Anniversary Card


Another softer looking card, this time using stamps and stencils from Clartiy Stamps. 

I started this card by laying the Clarity "Leafy Swirl" stencil over the top of a piece of white card, securing it with low tack tape.

This stencil is quite tricky to use as there is a lot of empty space between the design and the actual swirls are very thin, so I had to be extra careful when applying the Ranger Archival Ink (Pink Peony and Forget-Me-Not) through the stencil with a blending brush.  In fact I found I got a better result by just resting the brush bristles on the surface rather than moving the brush around too much.  

Once I was happy with the coverage, I inked the edge of the card using Versafine Clair "Warm Breeze" ink then stamped the foliage swirls using the Clarity "Leafy Swirl" stamp set.  I used the same ink to stamp the anniversary sentiment, using the Clarity A6 "Anniversary Occasions Sentiment" stamp set.

Finally, I added a little extra detail to the leaves with a white gel pen and added dots of Ranger Enamel Accents to the end of some of the larger stamped swirls.

Wednesday, 19 July 2023

Lavinia Stamps "Large Key" new home card


So back to a quieter looking card with a clean and simple design which was quick to make too!

I used an anti-static bag (filled with French Chalk) across the surface of the card before stamping, in an attempt to keep any stray embossing granules from sticking where they shouldn't be.

Using the Wow! Embossing Clear ink pad I stamped the new Lavinia Stamps "Large Key" in the middle of the card.  I then coated the stamped image with Wow! Rich Gold embossing powder and heat set.

Using Versafine Clair "Warm Breeze" ink, I stamped the Lavinia "Pixy Houses" along the top of the key.  I also stamped the "Welcome Home" sentiment, which is part of the Simon Says Stamps "Tiny Words" stamp set.

Next I used "Shadow Grey" Ranger Archival Ink, applied very lightly with a blending brush through the Lavinia Stamps "Waffle" stencil.

Finally, I added touches of metallic gold pen to the windows of the central house and added some smoke coming out of the chimney using a pencil.

Lavinia Stamps "Ginger" in a nest


Another Lavinia Stamps card from me today, this time using three of the new release stamps.

To start, I stamped the Lavinia Stamps "Head-dress" upside down, using Versafine Clair "Charming Pink" ink. I stamped it again on a post-it note and fussy cut the top area, before positioning it over the original stamped image on the white piece of card.

With the mask in position, I stamped "Ginger" the owl, which is the medium sized own of the three new releases by Lavinia Stamps.  I stamped using Versafine Clair "Fantasia" ink. I repeat stamped the owl on a post-it note and fussy cut it so that it would be a mask.  

Incidentally, with the masks I make, I don't bin them after one project, I keep them in a plastic wallet with the stamp for future use.  It saves a few moments of stamping and cutting, which I am all for!

I put some "Tumbled Glass" Distress Oxide Ink on to my glass mat, diluted it slightly with a spritz of water then applied the colour in a mottled style around the masked area of the head-dress and owl.  I then decided to add a touch of "Weathered Wood" Distress Oxide Ink, applied in the same way.  I then gave the surface a blast of the heat gun to dry it fully.

Once dry, I lay the Lavinia Stamps "Waffle" stencil over the top of the piece of card.  Using a blending brush, I applied "Wilted Violet" Distress Oxide Ink through the stencil, lightly at first and then with slightly more pressure towards the edges of the card.

I used a finger dabber, with Versafine Clair "Fantasia" ink around the edge of the card to make the central area colour pop more.

I then popped a dab of Dr PH. Martin's Bleed Proof white paint on to my glass mat, added a touch of water then used a fan shaped paint brush to create the splatters across the surface of the card.  I then set it aside to dry for a few minutes, while I tidied my desk up.

Once dry, I removed the two paper masks and stamped some extra branches around the nest.head-dress using the Lavinia Stamps "Woodland Set" with Versafine Clair "Charming Pink" ink.

I stamped the sentiment, which is part of the Lavinia "Heartfelt Verse" stamp set using Versafine Clair "Fantasia" ink. I then mounted the card on to a piece of purple cardstock and then glued it into position on a white card blank.

Now it was time to colour in the main image.  I used a selection of Derwent Inktense Pencils applied with a paint brush.  These are the shades I used:  Fuchsia, Mauve, Violet Blue, Malibu and Mineral Blue. I then added touches of Posca Pens and Gel Pens to add extra depth of colour and a lovely glitter look to areas too.  Finally, in the nest area, I added touches of Ranger White Enamel Accents and Liquid Pearls Blackberry.

Lavinia Stamps "Forest Flower" Card


So from going with really soft colours with the Clarity card I made last night, this morning I have gone for vibrant.

I started by creating the base, using three shades of Lavinia Element's Inks:  Lime Punch, Blue Atoll and Della Blue applied with a very wet mop brush so that the colours mingled.

Once dry, I then lay the Lavinia "Dynamic" stencil over the top and added "Lime Punch" and "Della Blue" Elements Inks through areas of the stencil.

I then moved on to the stamping, starting with Versafine Clair "Twilight" to stamp the new Lavinia Stamps "Forest Flowers".

I then used Versafine Clair "Verdant" and "Warm Breeze" to stamp the ferns, using the Lavinia "Fern Heads" stamps.

Using a couple of Lavinia Stamps "Hill Masks" I created the landscape using Versafine Clair "Blue Belle" and "Twilight".

I then added some foliage to the base of flowers using Versafine Clair "Twilight" dark blue ink with the new "Vine Set" and the older "Foliage Set".

I then inked the edges of the card using Verafine Clair "Fantasia" to give it a purple look.

I then moved on to the finishing touches, using Posca Pens and gel pens to colour the "Forest Flowers" and to add colour to the foliage at the base.  I used a white and a silver glitter gel pen to add highlights to areas too.

Tuesday, 18 July 2023

Clarity Stamps "Queen Anne's Lace" seedhead card


I decided to play with some Clarity Stamps and stencils to make this card. The end result, reminds me of a William Morris pattern for some reason, which isn't a bad thing!

I started by popping some low tack tape over the Clarity "Queen Anne's Lace" stencil to hold it in postion.  I then lightly applied "Tea Rose" Ranger Archival Ink with a blending brush, starting in the middle and fading out to the edge.

Retaining the position of the stencil, I then used "Cornflower Blue" Ranger Archival Ink around the outer edges and worked towards the middle of the card, fading the colour out.

Removing both the stencil and tape, I then used the square template from the 4x4 "Seedheads and Foliage Tiles" stencil set and coloured the central square with a darker sjade of "Tea Rose" Archival Ink.

Keeping the square stencil in position, I then lay another stencil from the "Seedheads and Foliage" stencil set over the top and popped a piece of low tack tape over the edge to hold it in position.  I used the "Cornflower Blue" Archival Ink to create the central seedhead design.

I removed the seed head stencil, retaining the square stencil and went around the edge of the square using a fine tip black pen.  I then lifted the square stencil and went over the central seedpods with "A Wink Of Stella" to give a beautiful shimmer.  Once dry, I then added a touch of white gel pen to the tops of each seed pod, to provide the impression of light hitting them.

Finally, using Versafine Clair "Nocturne" black ink, I stamped the sentiment, which is part of the Clarity "Entwined Sentiments" stamp set.  I then stuck three small sticky backed dots on each edge of the central square.  

Visible Image "Creative Chaos" Birthday Card


I have been away at the caravan for over a week.  I didn't take any crafting things with me and boy have I missed it.  So of course, as soon as the first load of washing was in the machine, I sat down at my craft desk! 

I needed to make a birthday card, so decided to do that first to get it out of the way, then I feel I can create without any pressure.

I stamped the flower from the Visible Image "Creative Chaos" stamp set using Versafine Clair "Charming Pink" ink.  I then stamped the flower head on a Post-it note, fussy cut around the edge and stuck the post-it over the flower head on the card.

I then used Ranger "Prickly Pear" Archival Ink through a section of the Visible Image "Seeing Stars" stencil, fading out around the edges.

I removed the stencil and the mask and then stamped the "Happy Birthday" sentiment, part of the Visilbe Image "Go To Words" stamp set, using Versafine Clair "Charming Pink" ink.

To colour the flower head, I used a Derwent Inktense pencil called "Pink Flamingo 0405" applied with a paint brush, diluting the colour initially and then building the colour up in areas.  I then added some white gel pen to lighten a few areas.

Tuesday, 11 July 2023

Lavinia Stamps "Mirror Image Stamping" on a mop brush background


A few days ago, Tracey Dutton of Lavinia Stamps did a demonstration creating a landscape using mop paint brushes.  I thought I'd try it for myself.


I didn't recall what paint/ink Tracey used, but decided to use inks from the Lavinia "Elements" collection, by putting some on my glass mat and using a very wet mop paint brush to lift and dilute the ink for painting.

I spritzed a piece of water colour card a little on one side and a lot on the other, this stops it from curling up.  I then used my fully loaded with water and ink large mop brush with "Sundance" Elements ink.  I used my heat gun to dry it, then applied "Russet Orange" then repeated the dry and paint using "Confetti" and then "Violet Chalk" ink

Once fully dry, I stamped the Lavinia "Tree Group" stamp on a piece of Acetate, stamping in Versafine Clair "Morning Mist" grey ink.  I then applied this on to the coloured background to create the reflection.  It doesn't matter if the image doesn't come out fully as reflections are not always exact due to the movement of water (this is called "Mirror Image Stamping").  I then stamped the "Tree Group" again, using Versfine Clair "Nocturne" black ink above the reflections already stamped.

I decided to darken the sky area using Versafine Clair "Twilight" dark blue ink.  Something I didn't think about was that the yellow and blue would create a green hint to the sky and reflection - I guess you'd call it a "Happy Accident"!

I used a black pastel pencil to create the impression of a little movement in the water.

Finally, I stamped the word "Silence" which is part of one of the new Lavinia Stamps word sets called "Nightfall", using Versafine Clair "Nocturne" black ink.

Monday, 10 July 2023

Visible Image "Shining Star" tag on a Brusho stencilled background


The heavens opened today, so it was an ideal time to play with a new Christmas stamp and stencil.

In my stash of backgrounds I've created previously, I came across a blue Brusho background which I felt could work with what I had in mind.  I cut the background down in to a tag shape and then used "Vivid Chartreuse" Archival Ink with a blending brush in two or three places.  I decided the tag needed some more depth of colour so opted to used "Majestic Violet" Archival Ink on the tag too.

I used the Visible Image "Ye Olde Christmas" text stencil with Versafine Clair "Fantasia" purple ink.  I then used the same ink to edge the tag before using a heat gun to dry the surface.

I rubbed an anti-static bag (with french chalk in it) over the surface of the tag.  I then stamped the large star, the sentiment and the smaller star from the Visible Image "Shining Star" stamp set with Wow! Clear Embossing Ink Pad.  Once I was certain that the image had stamped cleanly, I coated the stamped areas with Wow! White Puff Twinkle Embossing Powder and heat set.

I went around some of the stamped areas with a gold shimmer gel pen.  I added a few dots of white gel pen around the main star too.

Finally, I squeezed some "Crystal" Stickles on to my craft mat and using my finger tip, added sparkle to areas of the tag.


Sunday, 9 July 2023

Lavinia Stamps "Floral Wreath" Rocker Card


I used a die today that has been in my stash for at least a couple of years and had never been used.  I decided to address that today! 

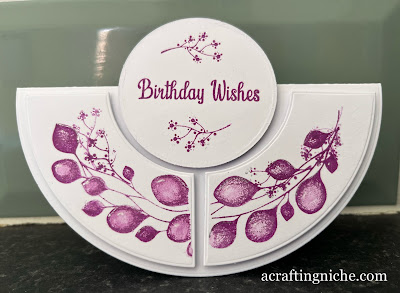
Using a 300gsm white card, I die cut the four shapes, the large circle for the background, the smaller circle for the sentiment and two sections of the half circle using the Crealies NL "Modern Patchwork" die set.


I then folded the large circle in half using a bone folder to give a nice crisp edge.

I then moved on to the stamping of the die cut pieces.  I added a touch of Herma removable glue on the reverse to hold them into position on my stamping platform.  I used the magnets as well as I wanted to be sure there was no movement.

I used Versafine Clair "Purple Delight" ink to stamp the Lavinia Stamps "Floral Wreath" stamp and the birthday greetings, which is part of the Lavinia "Heartfelt Verse" sentiment stamp set. I coloured the wreath using Derwent Inktense "Thisle" pencil.

Once the ink was dry, I added foam pads to the back of the die cuts and placed in position.

Finally, I added touches of white gel pen to areas of the berries on the wreath to replicate where the light would catch, I also added areas of silver glitter using a gel pen to give a little sparkle to the card.


Saturday, 8 July 2023

Lavinia Stamps "Erwin the owl" card


This afternoon, my order of the new release of stamps by Lavinia Stamps arrived.  I'm always quite strict with myself when I receive new Lavinia products by listing them on my spreadsheet and re-packing them in plastic wallets as the film pocket that the stamps arrive in tear easily. While detailing and repacking the stamps, it provides me with an opportunity to look at them and throw some ideas around my head of how I can use them. 

I decided "Erwin" the largest owl would be used first, which I paired with the new "Vine Branch".

I stamped "Erwin" in Versafine Clair "Acorn" brown ink.  I then multi stamped the new "Vine Branch" in Versafine Clair 'Shady Lane" green ink.

I then used two shades of Ranger Archival Ink:  Prickly Pear and Leaf Green through the Lavinia "Waffle" stencil.

I used a selection of products for colouring the image, starting with Derwent Inktense pencils, gel pens and Posca Pens.

I then decided that the branches needed something else, so used the shorter dangly branch from the "Foliage Set" with Versafine Clair "Shady Lane" in first and second generation stamping.  I then added yellow and orange Posca Pens to add some flowers to the end of them.

Funky Fossil Designs "In the neighbourhood" new home card


Here's a "new home" card I made using Funky Fossil Designs products.

I started by applying two lines of low tack masking tape across a piece of white card, about two inches apart.

Within the lines of masking tape I applied three shades of Archival Inks using blending brushes.  I used the Pink Peony, Orange Blossom and Cornflower Blue shades covering the rectangle.

Over the top of the blended ink area, I lay the Funky Fossil "In the neighbourhood" stencil, securing with a tab of low tack tape and used "Cornflower Blue" Ranger Archival Ink with a blending brush through the stencil.

I removed the stencil and the masking tape, then added little white dots of gel pen to the sky above the houses, just to break up the colour a little.

Finally, I added the "Home - is the nicest word there is" sentiment, which is part of the Funky Fossil "Home" stamp set, stamped in Versfine Clair "Nocturne" black ink.  I then stuck the piece to the front of a card blank.

Friday, 7 July 2023

Visible Image Stamps "Shining Star" new job card


I've made a "new job" card using the Visible Image "Shining Star" and "Anyone For Bubbles" stamp sets.

I've used a Wow!  Clear Embossing Pad with Wow! Rich Gold Super Fine Embossing Powder and then heat set.

I've used a metallic gold pen to draw lines and dots around the edge of the card.  For the champagne, I have used the "Lemon" Derwent Intense pencil and a white gel pen.

To colour the star, I have used "Sunflower" Ranger Archival Ink with a blending brush to give a light dusting of colour.

Lavinia Stamps "Lavender - Just for you" card


Here's a quick card I made this morning using a couple of Lavinia Stamps. 

I started with a 5x5 card blank.  In the bottom right hand corner I started to stamp the Lavinia Stamps "Lavender" using Versafine Clair "Shady Lane" for the stems and "Purple Delight" for the flower heads.  I multi stamped in both first and second generation stamping.

I lay the Lavinia Stamps "Waffle Stencil" over the top of the stamping, applying "Shadow Grey" Archival Ink through the stencil with a blending brush, keeping the stencil design close to the stamping and fadeing out towards the top and the left.

To ground the stamping, I used "Mowed Lawn" and "Weathered Wood" Distress Oxide inks, slightly diluted and applies with a paint brush.  When dry, I used a 2B pencil to make the area a little darker in the shadow areas.

Thursday, 6 July 2023

Clarity Stamps "Seedheads & Foliage" Thank You Card


As soon as I saw the Clarity Stamps 4x4" Seedheads & Foliage stencil set on the Clarity web site, I knew I had to get it ordered.  My order arrived this afternoon, so I obviously had to have a play session!

I decided to use the leaf stencil, positioned in the middle of a small piece of white card, measuring approximately three and a half inches square.

I used three shades of green Archival Inks through the stencil, starting with the lightest shade which was "Prickly Pear".  Then on to "Leaf Green" and finally "Fern Green" around the outer edge of the leaf.

I removed the leaf stencil and then positioned the square aperture stencil that also came in the "Seedheads & Foliage" stencil set and drew around the inner edge of the square with a fine tip black pen to create a frame.  I then added three dots to each edge of the inner square.

I mounted the white card on to a piece of Kraft card, then on to a white card blank.

Using Versafine Clair "Shady Lane" a mid green coloured ink, I stamped the sentiment which is also by Clarity and is part of their "A6 Thank You Occasions Sentiment Stamp Set".  Finally, I added three dots of Ranger "Glossy Accents" to the leaf to replicate rain drops.

Visible Image "Art Rebel" Birthday Card


It's that time of year when I needed to make a birthday card for my Hubby.  I've been putting it off for a couple of weeks, but time is running out so I bit the bullet and made this card for him.

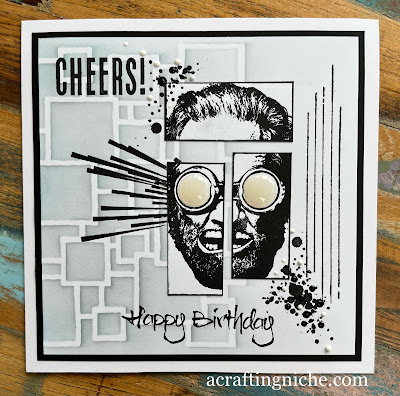
I used a piece of white 6x6" card for the base and lay the Visible Image "Square Route" stencil over to the left hand side of the card. I used two shades of Archival Inks through the stencil, first using "Shadow Grey" and then "Garden Patina" fading the colours out towards the right hand side of the card.

On a separate piece of white card, I used Versafine Clair "Nocturne" black ink to stamp the three face sections from the Visible Image "Art Rebel" stamp set. I then cut the three pieces down along the stamping line and inked the bare edge with a finger dabber and "Nocturne. Then glued the three sections into position slightly to the right of the central point of the card.

Once the glue was dry, I mounted the card onto a piece of black paper and then on to a 7x7" white card blank.

Now it was time to add the extra details.  I added the horizontal lines from the left of the face  and the large dot/splatters at the bottom right of the face from the Visible Image "Set the tone" stamp set with Versafine Clair "Nocturne" black ink.

I used the same ink with the vertical lines on the Visible Image "Shape It Up" stamp set.

I then moved on to the sentiments.  I used the "Cheers" from the Visible Image "Bring on the beers" stamp set and the "Happy Birthday" sentiment from their "Happy Birthday" stamp set.

Finally, I added some black and white dots using Ranger "Enamel Accents" and used Ranger "Glossy Accents" for the lenses of the goggles.

Book Review: "A December to Remember" by Jenny Bayliss


I was fortunate to read and review this book for Netgalley, before the publication date of 28th September 2023.  You can pre-order the kindle or paperback version on this Amazon link.

I absolutely enjoyed this book .  It's about three sisters, fathered by the same man but with different mothers, all with totally different lifestyles.  As children, the only time they would meet up would be for a month is the summer holidays, where they had the time of their lives living freely and enjoying each others company.


As adults, the girls lead totally different lives, with minimal contact. Maggie the eldest is a green-grocer shop keeper and widowed mother of two, lives in the same village as her father, but would rarely see him as he would be away on his hippie style travels.  Professional Simone, lives in London with her wife, while the youngest daughter Star leads a free and similar hippie life style to their father.

Life for the sisters changes when they each receive an envelope from a solicitor, informing them that their Father has died on his travels and that the contents of his curio/antique shop and his estate would be left to them as long as they complete various challenges.

The challenges force the sisters to work together, even though they don't really like or even respect each other.  Their relationships are messy, but they each have a need for money, so are driven to complete the challenges with the inheritance dangling in front of them like a carrot.

Wednesday, 5 July 2023

Sweet Poppy Stencils "Leaf Aperture Stencil" Life Is A Journey Card


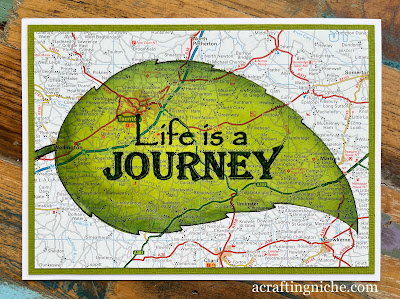
Today, I received my order from Sweet Poppy Stencils, which included their new "Rose Leaf Aperture Stencil".  I obviously wasted no time in trying it out, making this quick card.

I used a page from an old road atlas as the base for this card.  Laying the "Rose Aperture Stencil" over the top.  I applied three shades of Versafine Clair green inks to the leaf shape, starting with "Verdant", the lightest, then "Shady Lane" and finally "Rain Forest".

I then stamped the "Life is a journey" sentiment over the top using Versafine Clair "Rain Forest" ink.  At this stage, I realised that the atlas page was behaving a little differently to the card that I normally stamp on.  The ink was sitting on top rather than being absorbed and drying.  I wafted my heat gun over the surface then set it aside for a couple of hours.

Returning to the leaf, I used a fine tip black pen to outline the leaf.  I then mounted it on to a piece of green card and then on to a white card.

Visible Image "Live In the moment" Dragonfly Card


I'm still in Visible Image mode today, making this dragonfly card.

I started by stamping the dragonfly (part of the Visible Image "Live in the moment" stamp set) in two colours of Versafine Clair" inks, "Twilight" for the body and "Warm Breeze" for the wings.  I then coated the stamped area in Wow! Clear Embossing Powder and heat set. The sentiment, also by Visible Image, part of their "Happy Birthday" stamp set was also stamped in "Twilight" and heat embossed in the same way.

I then started on the background, using a paint brush and different strengths of four shades of Distress Oxide Inks:  Tumbled Glass, Salvaged Patina, Cracked Pistachio and Mermaid Lagoon, fading the colours out towards the top left corner.  I then used a heat gun to dry the surface.

Next I used the Visible Image "Ripples" stencil with two shades of Archival Inks:  Garden Patina and Shadow Grey.

I then used the dots in the Visible Image "Two Tone" stencil with a gold shimmer pen to add tiny shimmery sparkles.

Next, I painted the wings of the dragonfly.  I created a beautiful shimmer look by painting green Cosmic Shimmer "Iredescent Shimmer Water Colour", which although green also has a hint of gold to it too.

Now I added the finishing touches to the card.  I used Ranger "Glossy Accents" to stick some flat backed beads to the surface of the card.

I used a metallic gold pen along the right hand and bottom edge of the card. I then added green dots using a unibal Signo pen.


Tuesday, 4 July 2023

Visible Image "Leave Your Fears Behind" Card


Another card using the Visible Image "Flower Ink Stencil".  I actually made this one first, but for some reason it didn't gel with me, so I put it to one side, made the sunny card then returned to this one to finish it off with more detail. 

I started off by laying the Visible Image "Flower Ink Stencil" over a piece of white card, keeping it in place with low tack tape.  I then used Versafine Clair "Cheerful" yellow ink and then "Summertime" orange ink.

Over the top of the flower stencil, I lay the Visible Image "Strobes" stencil over the top, securing with another tab of tape.  I then used a blending brush with Versafine Clair "Charming Pink" ink to create the multi coloured petals. I then lifted the tape and stencils.

Using Versafine Clair "Nocturne" black ink, I stamped the bird and the sentiment, both are part of the Visible Image "Leave Your Fears Behind" stamp set.

I then set too embellishing the card.  I used white, gold and black gel pens.  I used a bright pink Posca Pen.  I used white Ranger Enamel Accents and Liquid Peals in a shade called "Outrageous" which is a vibrant orange colour.


Visible Image "Flower Ink" stencil card


wanted to make a cheerful and bright card with a positive vibe.  This wasn't for any particular reason, I just fancied making something to reflect the sunshine of today. 

Using a 6x6" white piece of card, I lay the Visible Image "Flower Ink Stencil" over the top and secured using a piece of low tack tape.

Using a blending brush I added colour through the stencil using Versafine Clair "Cheerful" yellow ink and "Summertime" orange coloured ink.

I removed the stencil and added a little detail for the petals using a pastel pencil.

In the middle of the flower, I used a stamp from the Visible Image "Random Art of Kindness" set with Versafine Clair "Summertime" orange ink.  I then used a pink Posca Pen to add extra detail to the central area.

Using Versafine Clair "Twilight" dark blue ink, I stamped the sentiment, which is called "Laugh Louder" by Visible Image Stamps.

I added extra pink dots around the edge of the stencilled flower using a brigh pink Posca Pen.  I then added white dots using a white gel pen and then larger white dots using Ranger Enamel Accents.

Visible Image Stamps "Where dreams take you" card


Another early morning crafting session from me, today I've been using Visible Image stamps. 

I had a rummage through my backgrounds file and found a Brusho background where I had a dark blue/purple with runs of colour towards the bottom.  I thought this would be ideal for what I had in mind.

I stamped the Visible Image "Fibonacci" (grid with curl) using Versafine Clair "Twilight" dark blue ink.

Using Versafine Clair "Nocturne" black ink, I stamped the Visible Image eye, which is part of their "Where dreams take you" stamp set.  I then stamped the word "Vision" which is from the same stamp set.

I used the same ink to stamp the detail on the left hand side of the card, which are from two Visible Image stamp sets, ""Random art of kindness" and "Rays of light".

I used Van Goch Pastel Pencils to add colour to the eye area.  Added extra black and white dots using Ranger "Enamel Accents" and used a white gel pen to add a little white to the eye, to give the impression of light hitting it.

Monday, 3 July 2023

Sweet Poppy Stencils "Deck the Halls" Holly Gift Tag


I've been making Christmas gift tags today - it's been raining and I was cold, so I was kind of in the mood!

I started by cutting a white tag, then stamped the Sweet Poppy Stencils new Christmas Botanicals "Holly Floourish" and "Holly Sprigs" stamps in Versafine Clair "Shady Lane" green ink.

I then coloured the background using a paint brush and "Antique Linen" Distress Oxide Ink.  I then added more mottled/aged detail by using "Tea Dye" Distress Oxide Ink in the same way.  

Next, I coloured the holly using a paint brush again with two shades of green Distress Oxide Ink:  "Mowed Lawn" first, then "Rustic Wilderness".

I then turned my attention to the berries, again using two shades of Distress Oxide inks:  "Barn Door" and "Lumberjack Plaid".  

I used Versafine Clair "Chianti" to stamp the Sweet Poppy sentiment, which is part of their "Festive Phrases" stamp set.  I used the same ink to edge the tag using a finger dabber. 

I popped an off-cut of paper over the sentiment and using a fan shaped paint brush and slightly diluted Dr. Ph. Martin's Bleed Proof white paint, splattering across the holly area to give the impression of light snow fall.

Once dry, I mounted the tag on a piece of co-ordinating card and added touches of metallic gold gel pen and white gel pen to areas of the holly.


Sunday, 2 July 2023

Clarity Stamps "English Garden Elements" Thank You Card


I've had a play with a Brusho background off-cut I found in my stash, it was just 4x4" so had been hanging around for a while and it was use it or bin it.  I decided to use it to make this card. 

I decided to use "Lost Shadow" Distress Ink through the Clarity Stamps "Zig Zag Stencil.

I then used Versafine Clair "Shady Lane" green ink in first and second generation stamping to stamp the foliage which is part of the Clarity "English Garden Elements" stamp set.  I used the same ink to stamp the greeting, which is part of the "Thank You Occasion Sentiment" stamp set.

Using Versafine Clair "Shady Lane" I inked the edges of the card then used gel pens and Posca Pens to create the impression of flowers in the foreground.

Saturday, 1 July 2023

Visible Image "Wings of Change" Card


I was awake early this morning, so decided to have a play with my Visible Image Stamps.  I don't use them often enough!

I started by masking of the edges of a piece of white card.  In the un-masked area I used two shades of Distress Ink:  Wild Honey and Abandoned Coral.  I used a heat gun to dry the area then added splatters of more "Abandoned Coral" ink. I then removed the masking tape.

I used dots from the Visible Image "De-strerssed" stamp set with "Abandoned Coral" Distress Ink diagonally across the coloured background.

Using Versafine Clair "Nocturne" black ink, I stamped the "Grunge Flourish" and then stamped the wording, which is part of the "Wings of Change" stamp set.  I also added some extra rings using the Visible Image "Shape It Up" stamp set.

On a piece of white card, I stamped three butterflies, also part of the "Wings of Change" stamp set, using two shades of Versafine Clair inks (Summertime and Charming Pink) over the top of each other to create the shade I wanted.  I then fussy cut the butterflies and stuck them on to the card.

Finally, I added black and white Ranger "Enamel Accents" to add a little dimension.